Transferring Data From a Past CMS
If you're a returning client, we recognize the importance of being able to streamline your data entry process by using data from your past app in your newly updated app. This guide will walk you through the process of exporting your data from a past year's CMS and importing it to this year's CMS.
1. When you log in to the CMS, you will see the different years of your app available to you. In most cases, it will be obvious - such as 2022 Awesome Event vs. 2023 Awesome Event. Occasionally, you will see Awesome Event vs. 2023 Awesome Event. We've changed our naming conventions over the years but the concept remains the same. Your newest app will be named with the current year in front of your event name. Select the CMS from your past event. The process we will be outlining here is to export data from your past event and import the data into your current event.

2. Determine what data you want to transfer over. For example, are your Places & Stages the same as a prior year while the Events and Performers are new? In this example, you'll want to transfer over Places & Stages from last year to this year, while Events and Performers you'll enter fresh for this year.
3. Some data requires that other data points exist in the system first.
For example, an Event references a Performer and a Stage already in the system. So, you need to import Stages data prior to Events. Determine the order of your imports with this in mind. If you're in doubt, import in this order: Categories, Places, Stages, Performers, Events.
Articles, FAQ, Partners, and Banners can be imported in any order as there are no dependencies to keep in mind.
4. Consider your Categories. Categories determine where your data will appear throughout your app. If a Category is not assigned to a piece of data, it won't appear in your app. So, you need to ensure before starting your import that the Categories you used last year are what you want to use again, and then confirm those Categories are set up in your current year CMS. If the Categories don't match from your Export to then be Imported, the data will still import but no Category will be assigned and you'll need to modify that manually. So, once you export your data from last year check the Categories column. Then, go into your current year CMS to Event Data --> Categories and ensure those Categories are setup before you import.
5. Now, you're ready to export and import your data.
Exporting & Reformatting Your Data
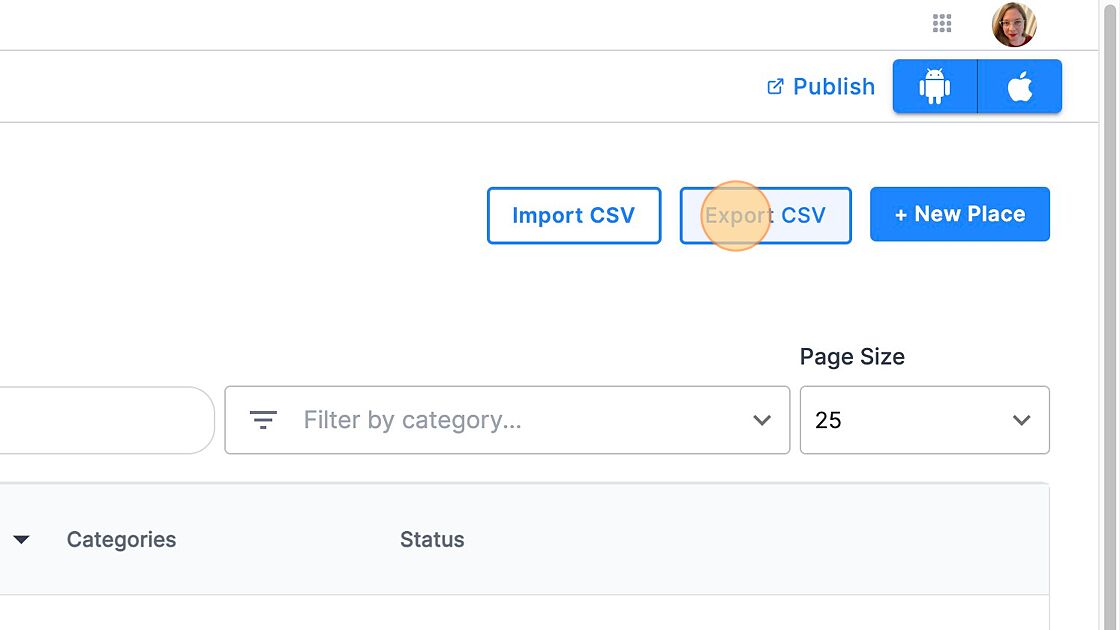
1. Click on the screen you want to export. Here, we're exporting from Places.

2. Click "Export CSV"

3. Open the CSV file that you just exported. You should be able to locate this in your downloads file on your computer. You can open the document in an application such as Excel, Google Sheets, or Numbers. Whatever you choose to use, just ensure that when you're done editing the document you File -- Save As -- CSV. The import requires a CSV file.
- Any field that mentions "id" must be left blank for your initial import. Clear any data in fields such as id, category ids, primaryMapid, mapCategoryId, etc. Keep the column header in place and keep the column in the spreadsheet. Simply delete any data that you see in those cells. This does NOT apply to feedmappingID, a required field for any import you make up on your own (1, 2, 3, 101, 102, 103, etc).
Note: Once you're up and running on your CMS this year, those id fields will become relevant. If you're exporting and importing in the same CMS, the id values will align and allow you to modify existing data. But, when you're exporting from a past CMS to a brand new CMS, the fields must be blank for your initial import as they have nothing to match up to at that point.
- If you have any URLs in your spreadsheet that begin with http:// they must be modified to https://. We no longer accept http links so if you entered data with that link type in the past you will need to adjust that for this iteration.
Save as a CSV file when your edits are complete.
4. Navigate in the CMS to your app for this year and select the screen you want to process the import on. Select Import CSV.
If you run into any issues, review our Importing Your Data Guide for full instructions on how to import your data.